How To Scan For IoCs with Yara Rules Using Arsenal Image Mounter & Loki

Yo Wuddup Everybody It’s Ya Boi James here coming at you with a new blog post!
Today I’m going to detail the process of mounting a forensic image using Arsenal Image Mounter and then using Loki to scan the image for known IoCs(Indicators of Compromise) with Yara rules
Step 1: Let’s Download Our Tools
-
Grab Arsenal Image Mounter From Here: https://arsenalrecon.com/downloads/
-
Grab Loki From Github Here: https://github.com/Neo23x0/Loki
-
Grab a disk image and if you don’t have one you can grab one from here: https://dfirmadness.com/the-stolen-szechuan-sauce/ (YES IK IT’S AWESOME! I really wish I could’ve been part of the data gen, Wubba lubba dub dub!)
Spoiler Alert: I will be making some posts in the future about that case made by our friends over at dfirmadness.com please go show them some love by checking it out, tell them I/@j3st3rjam3s sent you!
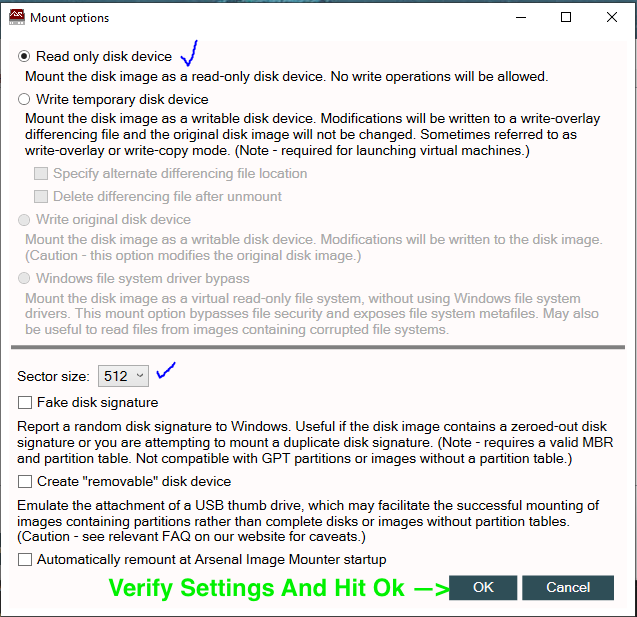
Step 2: Mount Your Disk Image As Read Only With Arsenal Image Mounter
- REMEMBER: WE’RE MOUNTING AS READ ONLY TO PRESERVE THE EVIDENCE. This is a case where we want to maintain the integrity of the image. Yes, I know there are times where you might want to perform further analysis on the system, but for this case let’s stick with Read Only 😉

Tip: If you’re mounting a Mac Image, Marie De Grazia has an excellent post here: http://az4n6.blogspot.com/2018/01/how-to-mount-mac-apfs-images-in-windows.html she’s a legend and I highly encourage you check out her work!
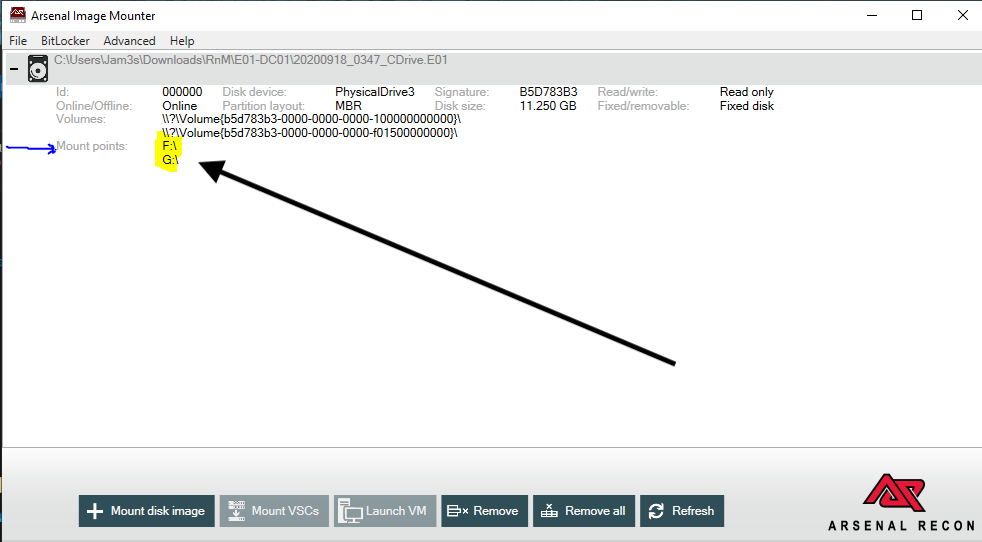
- Check it out! We got the image mounted and a couple mount points!
Step 3: Let’s Use Loki IoC Scanner to Scan Those Drives
-
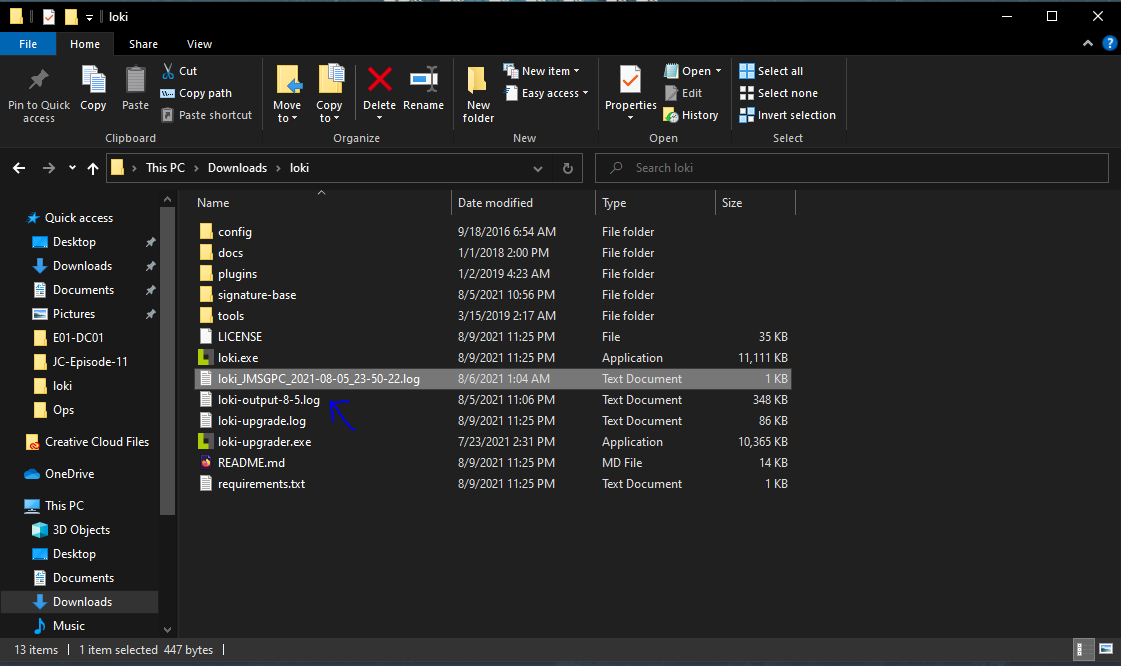
Once you’ve downloaded Loki from the Github repo Here extract it using an archiving utility like 7zip, RAR, etc.
-
At this point I wouldn’t be surprised if you start seeing some Windows Defender Alerts, as it will see the Yara signatures and think that it’s the real thing(the malware). However you can stop the alerts from deleting files and messing with your extraction by setting up an exclusion for the Loki folder. Take a second here though, and I want you to think. Don’t you think that’s awesome? What you’re doing right now is you’re manually doing what Windows Defender does through automation. Defender, has those rules already ingested and they scan your system periodically to protect you, and that’s why you have to keep your computer updated, to receive those new signatures/rules as new threats come out and we (Blue Teamers) figure out ways to detect and stop them. You’re literally learning that system. At this point you basically know how Antivirus solutions work. They work using IoCs and signatures like Yara rules! Isn’t it brilliant! Look at us go! Anyways, back to the action 🙂
Step 4: Add The Loki Folder As An Exclusion From Windows Defender
- Open Windows Security
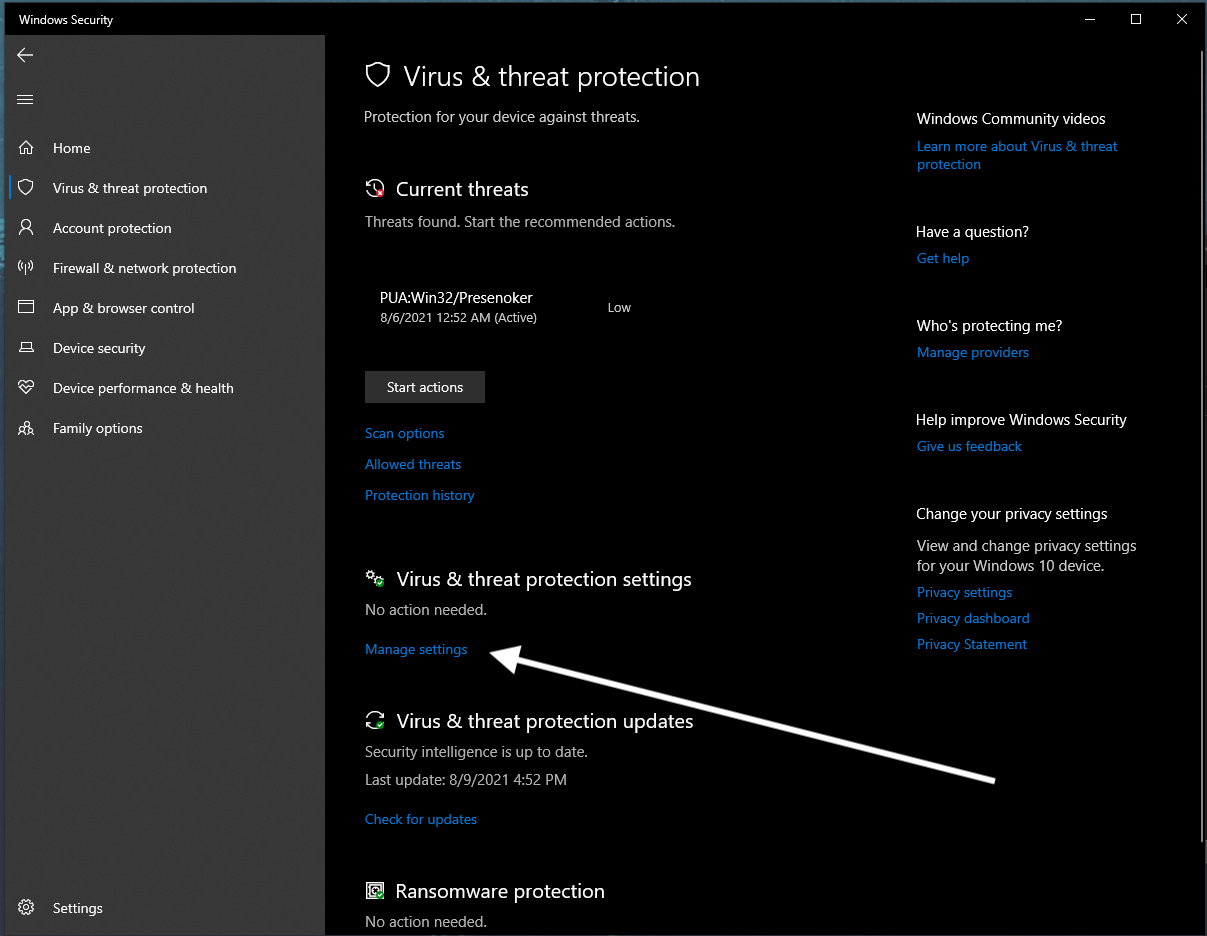
- Go to Virus & Threat Protection Settings
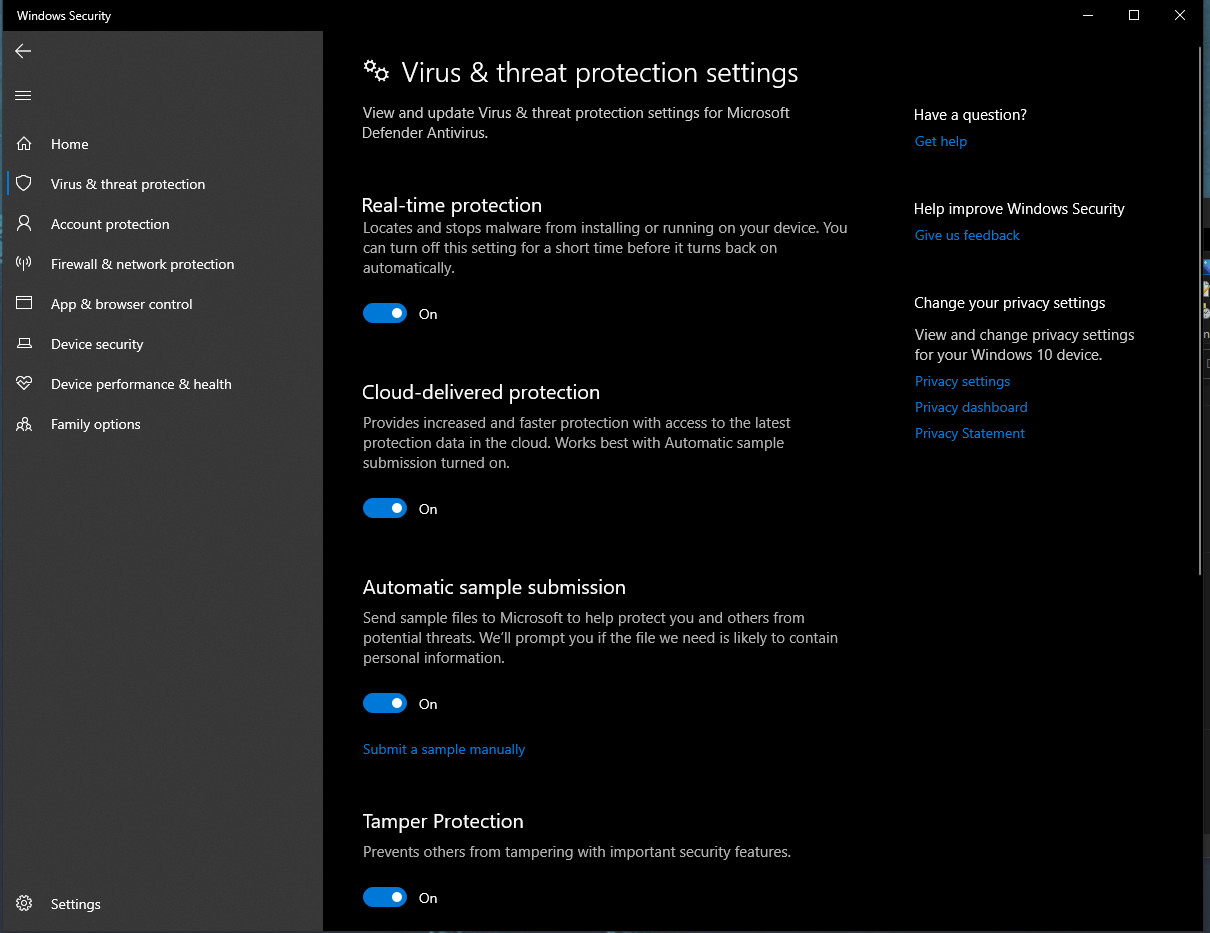
- Scroll Down and You Should See Exclusions
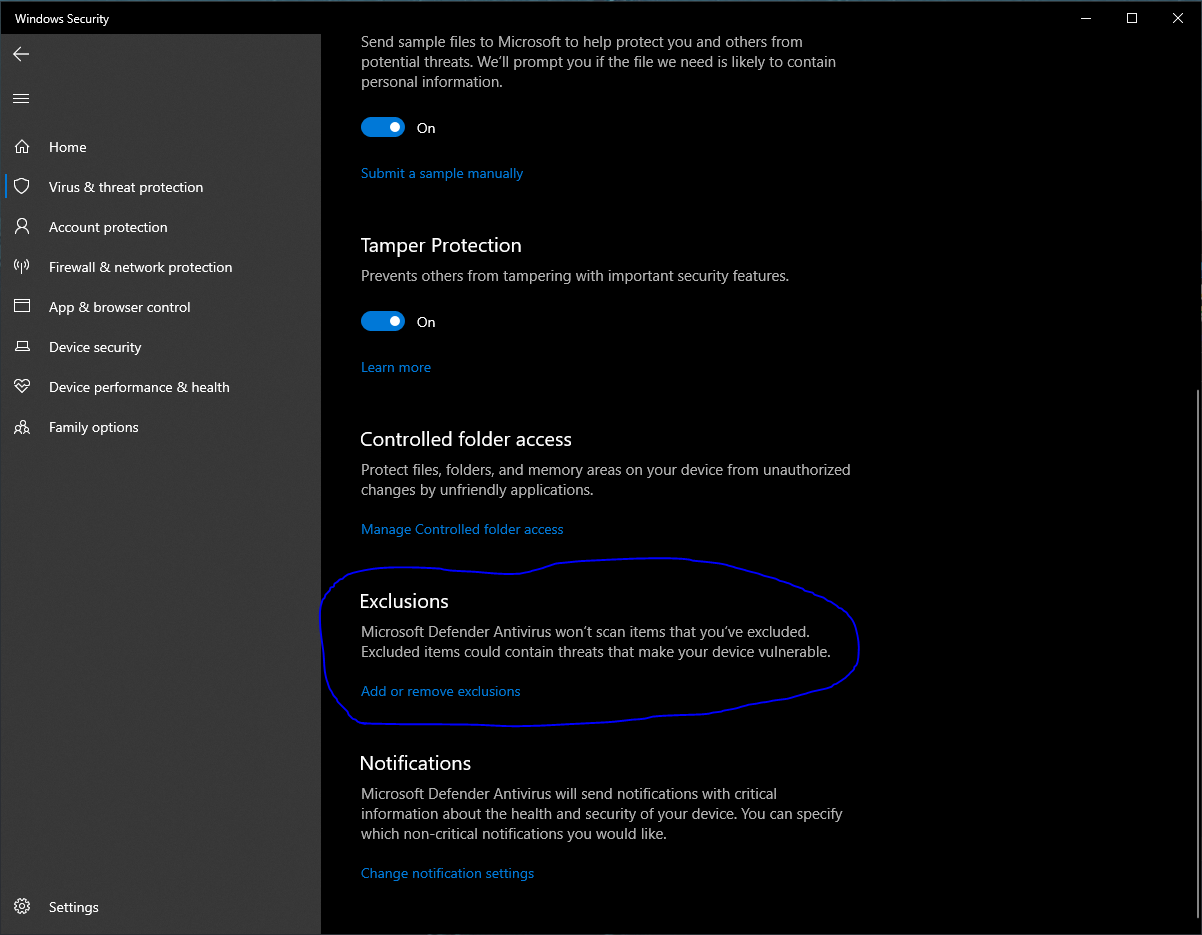
- Create an Exclusion for your Loki folder
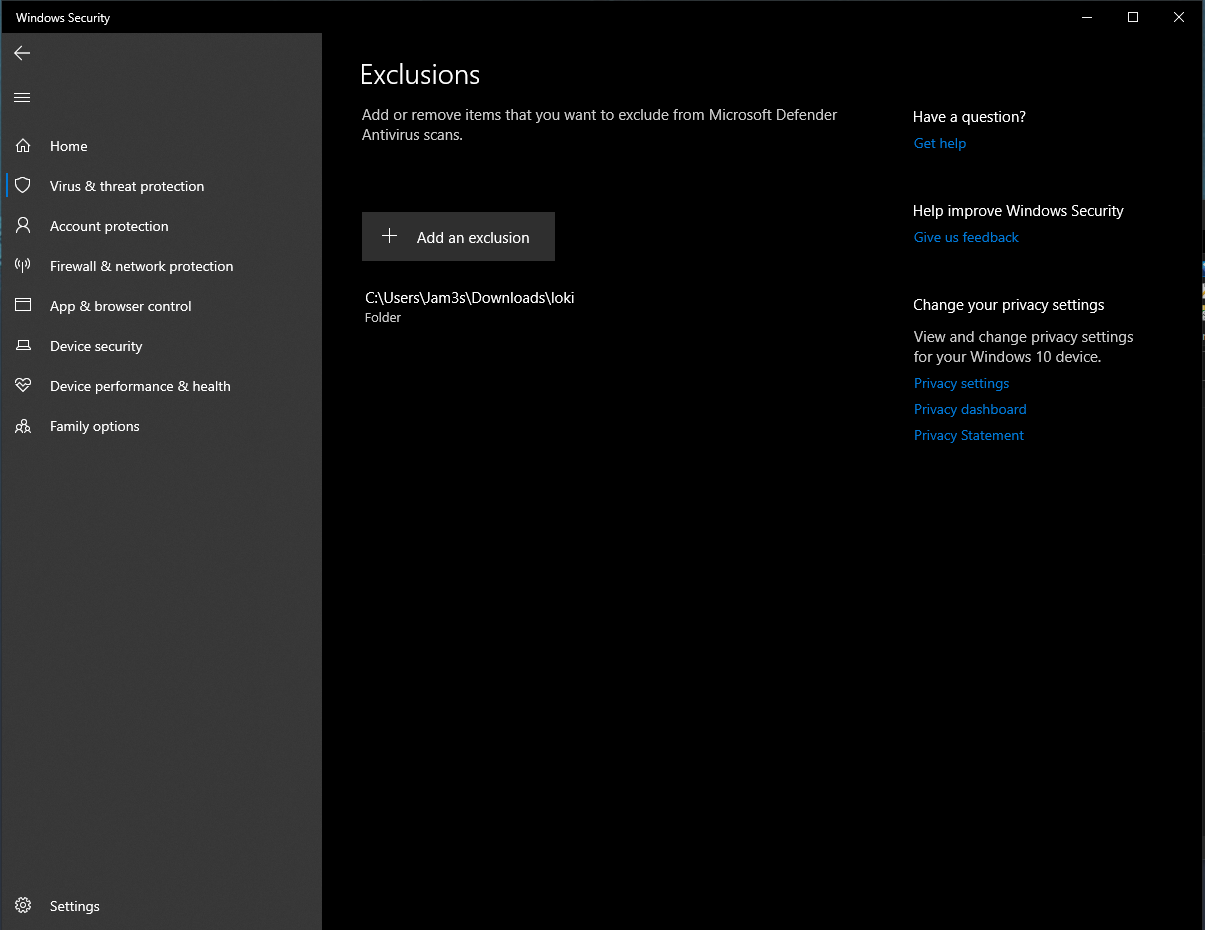
- Now that you have the folder excluded. Extract Loki again and you should be able to extract everything without Defender going and sniping your files
Step 5: Run The Loki Updater To Get The IoCs/Signatures/Yara Rules

- You should see something like below but prolly with a lot more output.

- Ayyyy Lit! Ok So now you should have Loki installed AND your forensics disk image mounted with Arsenal Image Mounter.
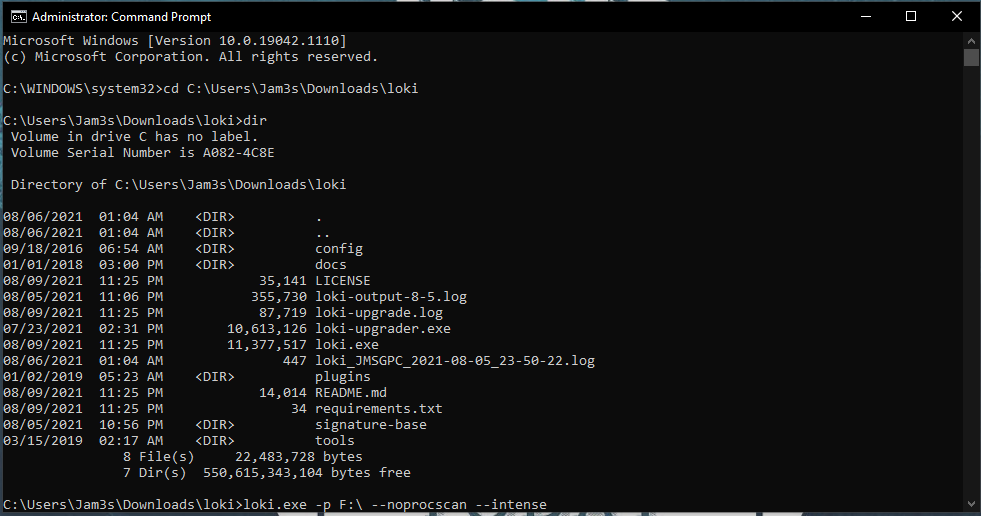
Step 6: Run Loki on The Mounted Drive
- Next is where the magic happens, you’re gonna run Loki on the drive with the main partition (the mount point where all the data is….YES, you could have more than just one….Guess what, Just Run Loki on the other mount point as well! Hahah simple as that my friend! 😅)
-
If you’re not comfortable with command line, don’t worry, I left ya some hints above 😉 Open the “Command Prompt” as Administrator and
cd(change directory) into the Loki Directory where theloki.exeis located. - You can read the Loki documentation on the Github page for all it’s goodness but a standard command leveraging Loki looks like
loki.exe -p F:\ --noprocscan --intense
- So
F:\would change to whatever drive letter your mounted partition is on, and we usenoprocscanbecause what Loki will do is scan the processes on your local computer, and since we’re using a disk image for 4n6, we don’t need to do that. NOW if you’re on an infected machine and you install Loki by all means remove that flag and let Loki scan your processes for anything strange and malicious. Theintenseflag means Loki will scan all your files, so don’t forget to include it.
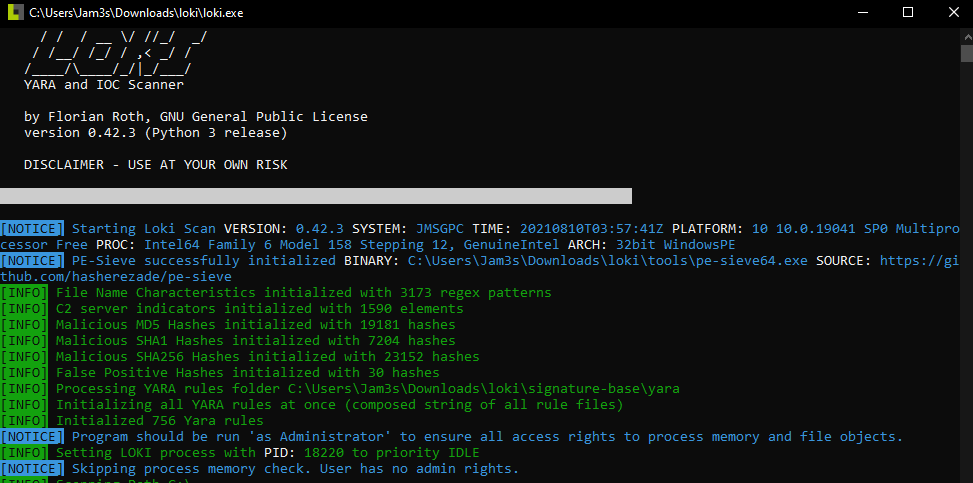
- At this stage Loki will start running, you can see the output live but it will take a while till it’s done. You’ll see a log file with the output of the command.
CONGRATULATIONS YOU JUST SCANNED A DRIVE FOR IoCs!
-
Now all you have to do is read through the output to see what your results are! I explain a little bit about the Loki output in my video but tbh every system is different so go through the log and if you see something you don’t recognize or you don’t understand, I’m sure you know what to do 😜 GOOGLE IT!
-
Here’s another resource that will help you start to recognize what Windows processes are normally on your machine but can potentially be used for hiding malicious activity. These kinds of programs are called “LOLBins”/”LOLBaS” or “Living of The Land Binaries and Scripts” https://lolbas-project.github.io
-
Thanks Y’all! Please Let Me Know If You Found This Valuable and If You Have Any Questions Or Need Some Help Feel Free To Reach Out To Me via Twitter @j3st3rjam3s or through the contact page