Quick Chat: Shadowsocks

Howdy howdy peeps!
Today I just wanted to really quickly chat about a software I recently tested out for the fun of it that’s frequently used over in China! So I know using a proxy isn’t the best when you can use a VPN but, lol. Let’s forget about that for the sake of the chat here.
Let’s Have a Quick Chat!
Shadowsocks is a Secure Socks5 Proxy that runs over TCP/UDP. It’s known for being used in China to bypass censorship while also allowing for selective sites that way you can use the proxy and still access China only sites. It uses Stream Ciphers, and Authenticated Encryption (AEAD). Lately China has been cracking down on a lot of the OpenVPN servers running in their domain, Shadowsocks can act as a temporary solution for folks while they find other VPN providers. Google also used it for the implementation of their VPN solution Outline! The technical break down is actually pretty cool. The white paper for it is here: https://shadowsocks.org/assets/whitepaper.pdf
How to setup Shadowsocks(On Ubuntu):
- Install Prerequisites (this is only if you’re using Ubuntu 16.04 or less)
$ sudo apt install software-properties-common -y $ sudo add-apt-repository ppa:max-c-lv/shadowsocks-libev -y $ sudo apt update $ sudo apt install shadowsocks-libev - Install Shadowsocks (Skip the above if you’re using Ubuntu 17.04 or later and do this)
$ sudo apt-get update $ sudo apt install shadowsocks-libev - Configure Shadowsocks Server by creating a config json file
$ sudo vi /etc/shadowsocks-libev/config.json- insert the following and replace with your own values
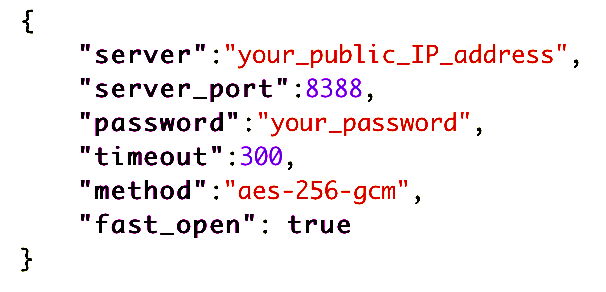
- insert the following and replace with your own values
-
Don’t forget to add the port you specify to your firewall. For more details on using firewalld you can refer to my command-center.
- Start the Shadowsocks server
$ sudo systemctl restart shadowsocks-libev.service $ sudo systemctl status shadowsocks-libev.service -
At this point the shadowsocks proxy server is running and you need to go to your client now.
- Configuring your client
- Now this part depends on which client you’re using. For this lab I just decided to use a Windows 10 box.
- Install the Shadowsocks Client
- Configure the Client
-
It’s pretty straightforward I’ve attached a snipe of the GUI once opened.

-
Click “OK” and With that you’ve got Shadowsocks configured!
- The next thing would be to configure your browser to use the proxy. That’s also pretty straight forward most likely to be found in the “Advanced” settings pages of your browser. Config there and you’ll be all set!
Potential Error You Might Run Into and Fix:
-
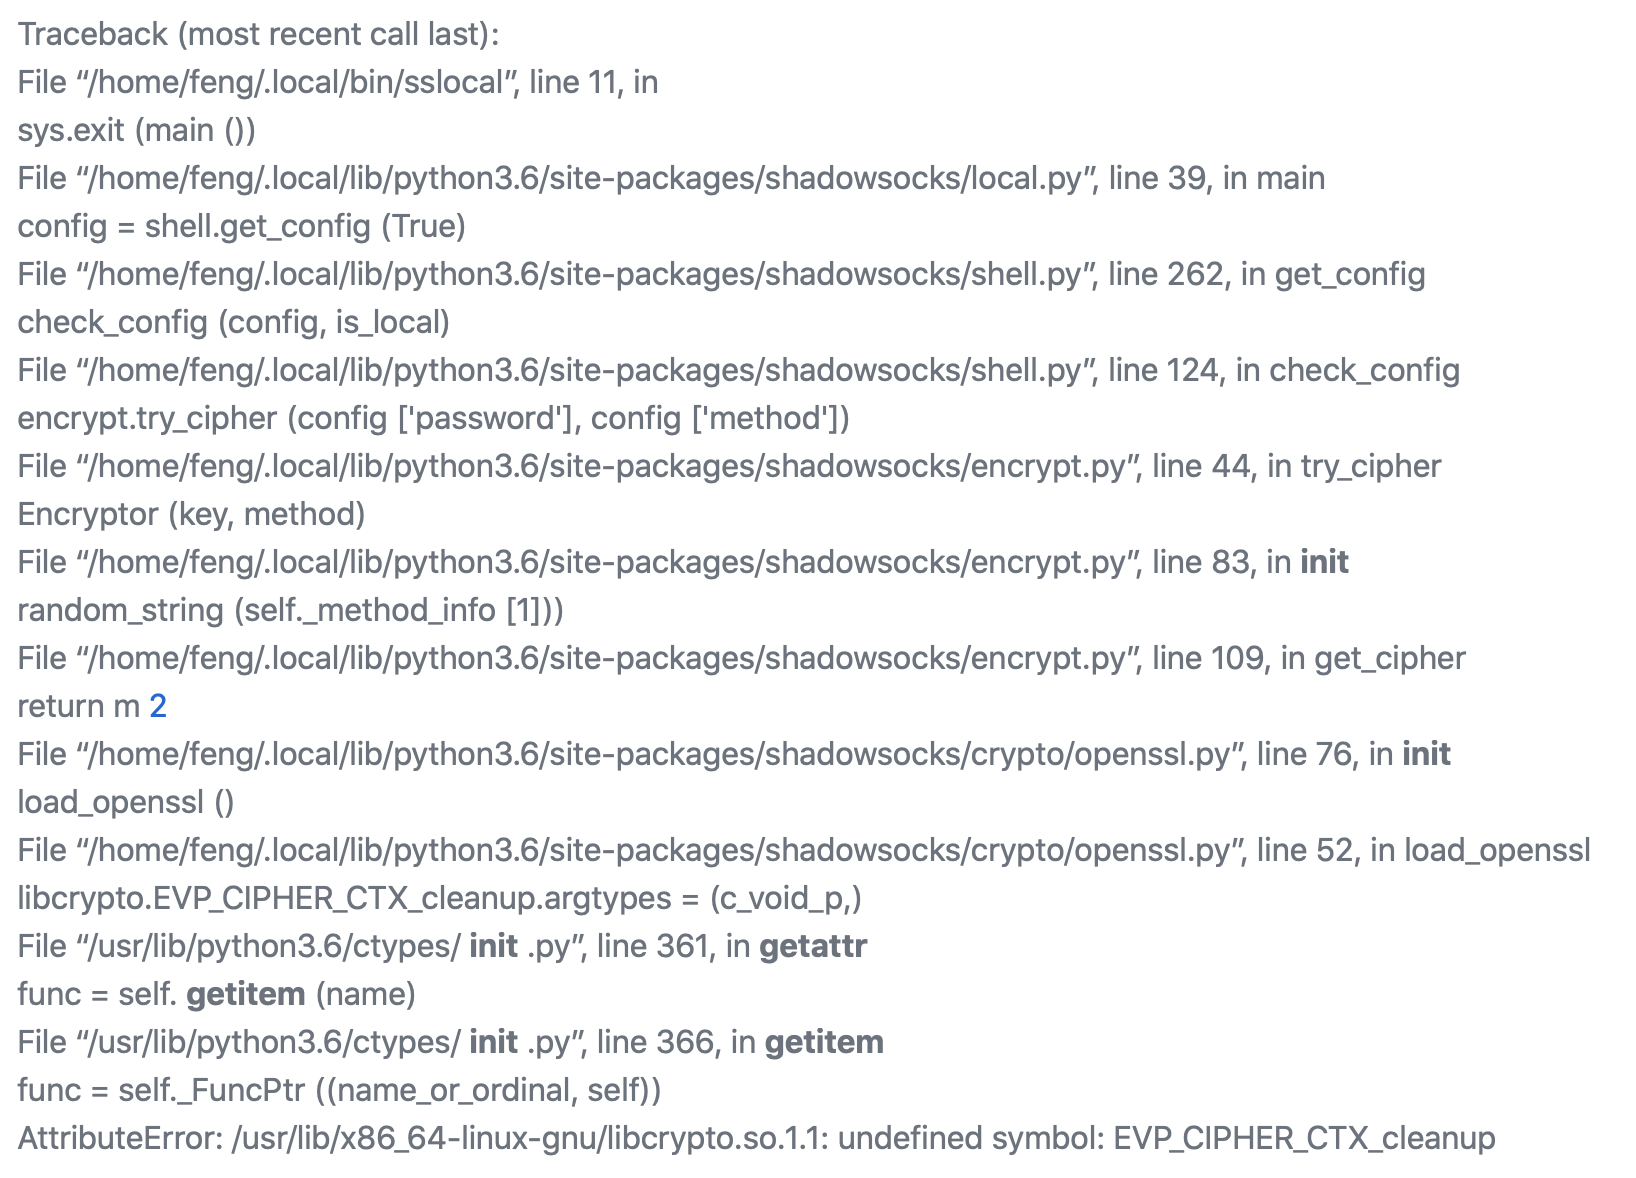
The above error dump details a potential error you might have when trying to start the Shadowsocks server. The reason this error occurs is because the function “cleanup” in
EVP_CIPHER_CTXno longer exists as it has become deprecated. Instead we’re going to change the configuration of openssl to use “reset” instead of “cleanup”. - Open the following configuration file for OpenSSL and Shadowsocks
$ sudo nano /usr/local/lib/python2.7/dist-packages/shadowsocks/crypto/openssl.py - If there’s not a file located there type the following to find out where it is
$ sudo whereis openssl.py -
Change all of the “
EVP_CIPHER_CTX_cleanup” (basically wherever you see “cleanup”) and replace them with “EVE_CIPHER_CTX_reset” - The above simplified is essentially just replace “cleanup” with “reset” in that openssl.py file.